The Versatility of Canned Chickpeas
A WIC Mom’s Pantry Superhero!
Canned Chickpeas Recipes From Snacks, Sides And Salads
When it comes to stocking up your pantry with versatile, healthy ingredients, few items can rival the incredible benefits of canned chickpeas. These tiny legumes may not wear capes, but they certainly possess superhero-like qualities that can transform your meals and save the day in the kitchen. Adding canned chickpeas to your recipes can unlock a world of nutritious and versatile meal options. Chickpeas, also known as garbanzo beans, are a powerhouse of nutrients and offer various health benefits for both you and your children. In this blog post, we’ll explore the many reasons why canned chickpeas should be a staple in every mom’s pantry and share some creative recipe ideas to inspire you.
Nutritional Powerhouse
Canned chickpeas pack a powerful nutritional punch, making them an ideal choice for growing children and health-conscious moms. Rich in protein, fiber, vitamins, and minerals, chickpeas can contribute to a well-rounded diet and promote healthy growth and development. With iron, zinc, folate, and magnesium among their impressive nutrient profile, these legumes can help combat iron deficiency and support overall well-being.
Convenient
Canned chickpeas are incredibly versatile and require little effort to incorporate into your family’s meals. Whether you’re a seasoned cook or a busy mom looking for quick meal solutions, these legumes can be easily incorporated into a variety of dishes. From salads and soups to curries and stir-fries, the possibilities are endless.
Kid-Friendly
Getting your kids to eat healthy can sometimes be a challenge, but canned chickpeas can come to the rescue. These legumes have a mild, nutty flavor that kids often find appealing. You can mash them into spreads for sandwiches, blend them into smoothies for added nutrition, or even turn them into crunchy, roasted snacks for those after-school hunger pangs.
Plant-Based Protein
For WIC moms who follow a vegetarian or vegan diet or are looking to reduce meat consumption, canned chickpeas are a fantastic plant-based protein alternative. Their protein content makes them an excellent meat substitute, ensuring your family gets the necessary protein intake for healthy growth and maintenance.
Recipe Ideas
Chickpea and Vegetable Curry: Whip up a hearty and nutritious chickpea and vegetable curry by sautéing onions, garlic, and ginger with your favorite curry spices. Add canned chickpeas, diced vegetables like bell peppers, carrots, and tomatoes, and let it simmer until the flavors meld together. Serve with rice or whole-grain bread for a satisfying meal.
Chickpea Avocado Salad: Create a refreshing chickpea and avocado salad by combining canned chickpeas with diced avocado, cherry tomatoes, cucumbers, and a tangy lemon dressing. This simple and delicious salad is perfect for a light lunch or a quick side dish.
Chickpea, Vegetables and Pasta: For a protein-packed pasta dish, toss cooked pasta with sautéed spinach or mixed vegetables, canned chickpeas, cherry tomatoes, and a sprinkle of parmesan cheese. The creamy texture of chickpeas complements the pasta wonderfully, making it a family favorite.
Canned chickpeas are undoubtedly a pantry superhero for WIC moms, offering a myriad of benefits that are hard to resist. From their nutritional prowess to their budget-friendly nature and incredible versatility, these legumes are a must-have for every health-conscious mom. By incorporating canned chickpeas into your family’s meals, you can ensure a delightful and nutritious dining experience that saves time and stress in the kitchen. So, let these humble legumes unleash their superpowers and elevate your culinary adventures to new heights!
Here are a few of our favorite recipes using chickpeas:
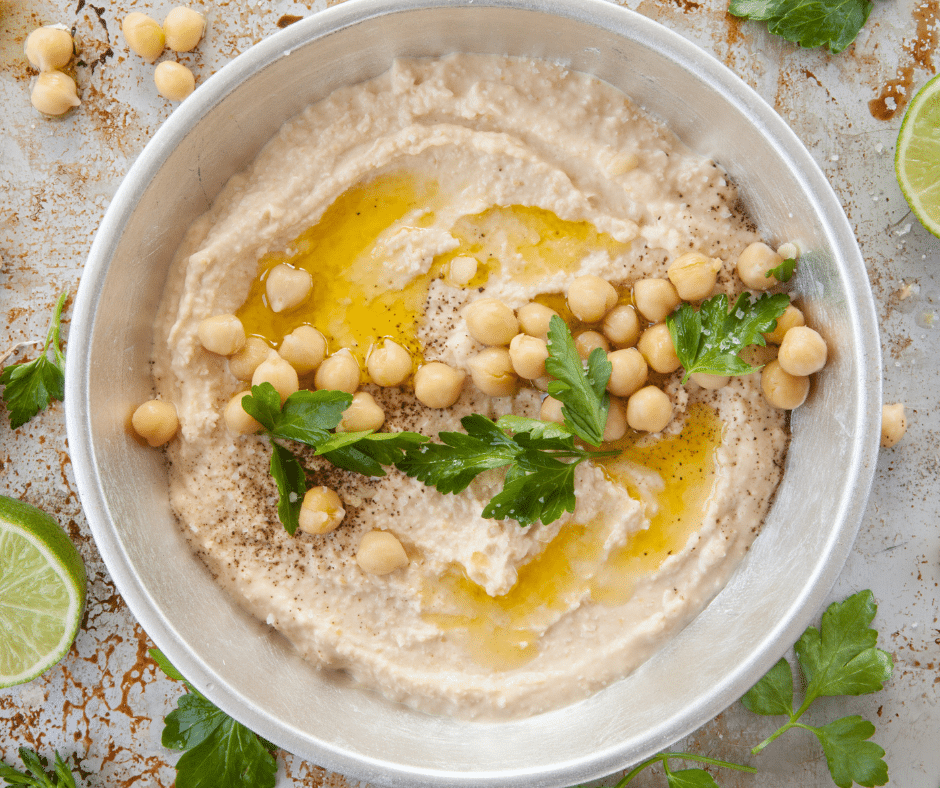
HUMMUS
You may have purchased pre-made hummus from the grocery store, but this dip is so easy to make at home. Plus, you can enjoy your homemade hummus without tahini! It’s a delicious and healthy dip that you can easily make using canned beans and their liquid. Here is a recipe for you:
1 can (15 ounces) of chickpeas (garbanzo beans), drained and liquid reserved
2 cloves of garlic, minced
1/4 cup extra-virgin olive oil
2 tablespoons lemon juice
1/2 teaspoon ground cumin
Salt, to taste
Water (or the reserved liquid from the canned beans) for adjusting consistency
Optional toppings: olive oil, paprika, chopped parsley
Rinse and drain the canned chickpeas (garbanzo beans) and reserve the liquid from the can.
In a food processor or blender, combine the drained chickpeas, minced garlic, lemon juice, ground cumin, and a pinch of salt. Start blending the ingredients together. Gradually add the extra-virgin olive oil while blending to help create a smooth texture.
If the mixture seems too thick, add a little bit of the reserved liquid from the canned chickpeas or water. Continue blending until the hummus reaches your desired consistency.
Taste the hummus and adjust the seasoning with more salt or lemon juice if needed. Once the hummus is smooth and well combined, transfer it to a serving bowl. You can drizzle some extra-virgin olive oil on top and sprinkle a pinch of paprika or chopped parsley for added flavor and presentation.
Serve the homemade hummus with pita bread, sliced vegetables, or your favorite dipping options.
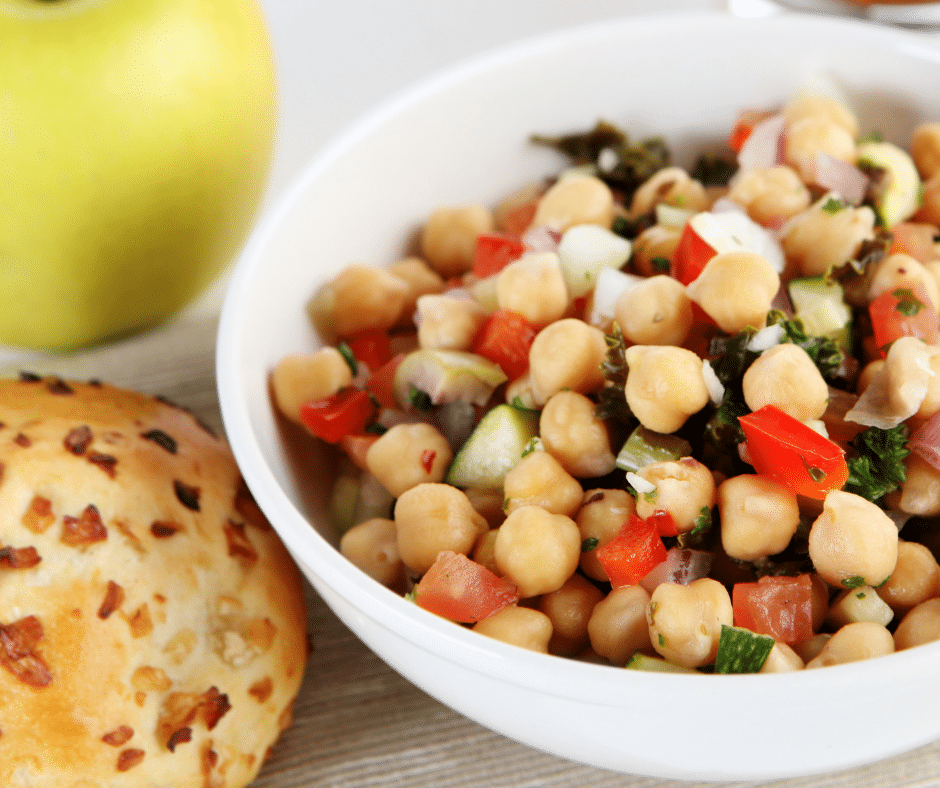
A refreshing and nutritious salad that’s perfect for a light lunch or a side dish for dinner.

CHICKPEA, VEGETABLE SALAD
1 can of chickpeas, drained and rinsed
Chopped fresh vegetables (cucumbers, bell peppers, tomatoes, etc.)
Chopped fresh herbs (parsley, cilantro, or mint)
Feta cheese (optional)
Dressing: Olive oil, lemon juice, salt, and pepper
In a large bowl, combine the drained chickpeas, chopped vegetables, and herbs. If desired, add crumbled feta cheese for extra flavor.
Whisk together the dressing ingredients in a separate bowl and drizzle over the salad.
Toss gently to combine and serve immediately.

ROASTED CHICKPEAS
Roasted chickpeas are a delicious and healthy snack that can be made using canned chickpeas.
1 can (15 ounces) chickpeas (garbanzo beans), drained and rinsed
1 to 2 tablespoons olive oil
1 teaspoon ground cumin
1/2 teaspoon smoked paprika (you can also use regular paprika)
1/2 teaspoon garlic powder
1/4 teaspoon cayenne pepper (adjust to your spice preference)
Salt and pepper, to taste
Optional: a pinch of any other spices you like (e.g., curry powder, chili powder, onion powder, etc.)
Preheat your oven to 400°F. Line a baking sheet with parchment paper or lightly grease it with cooking spray.
Drain and rinse the canned chickpeas thoroughly. Pat them dry with a clean kitchen towel or paper towels. It’s important to remove excess moisture to achieve crispy roasted chickpeas.
In a mixing bowl, combine the chickpeas, olive oil, ground cumin, smoked paprika, garlic powder, cayenne pepper, salt, and pepper. You can add any other optional spices at this point as well. Toss the chickpeas until they are evenly coated with the oil and spices.
Spread the seasoned chickpeas in a single layer on the prepared baking sheet. Make sure they are not too close together to allow for even roasting.
Roast the chickpeas in the preheated oven for about 25 to 30 minutes or until they become golden brown and crispy. You can shake the baking sheet or toss the chickpeas halfway through the baking time to ensure even cooking.
Once roasted to your desired crispiness, remove the chickpeas from the oven and let them cool slightly before serving.
Enjoy your roasted chickpeas as a nutritious and flavorful snack. They can also be used as toppings for salads, soups, or as a crunchy addition to various dishes.
Note: Roasted chickpeas are best when served fresh, but you can store any leftovers in an airtight container at room temperature for a day or two. Keep in mind that they might lose some of their crispiness over time.




 Did you make this WIC-inspired recipe? Let’s be friends. Tag us on Instagram or Facebook using @jcfoodmart
 Did you make this WIC Inspired Recipe – Yogurt Bark? Let’s be friends. Tag us on Instagram or Facebook using @jcfoodmart